As an Amazon Associate I earn from qualifying purchases.
If you’ve made sea moss gel at home, you’ve probably asked yourself: Does boiling it kill the nutrients?
It’s a good question, and one that doesn’t always get a clear answer. Some people swear by the boiling method because it yields a smooth, pourable texture.
Others say it ruins the nutrients that make sea moss worth using in the first place.
Sea moss, whether it’s Chondrus Crispus or Eucheuma Cottonii, is known for being rich in essential minerals. It’s a natural source of iodine, and many people use it to support skin health, thyroid function, and overall energy. But like most things, how you prepare it makes a difference.
This article examines the process of boiling sea moss, its comparison to cold soaking or blending, and how to preserve its benefits regardless of the chosen preparation method.

What Is Sea Moss?
Sea moss is a type of edible seaweed that grows in the ocean, often along tidal pools and rocky coastlines.
It has been used for centuries in parts of the Caribbean, Europe, and North America, both as food and as a medicinal aid.
These days, it’s gaining popularity in smoothies, powders, capsules, and gel form, mainly because of its nutrient content and wide range of claimed health benefits.
A. Nutritional Profile
Here are a few of the main nutrients found in Dried Raw Irish Sea Moss and similar types like Chondrus Crispus and Eucheuma Cottonii:
- Iodine – supports healthy thyroid hormones
- Iron – helps make red blood cells
- Magnesium – important for nerve function and muscle recovery
- Potassium – balances fluid levels in the body
- Calcium – supports bone health
- Zinc and selenium – aid immune response and cell repair
Sea moss also contains small amounts of vitamin C, vitamin K, and B vitamins, but its main strength is in its mineral content, especially when eaten regularly.
B. Common Uses and Benefits
People use sea moss for all kinds of reasons, from general wellness to specific support for skin, gut, or thyroid health. It’s popular in:
- Smoothies and juices (1–2 tablespoons of gel per day)
- Homemade jams or sauces (like Blueberry Chia Sea Moss Jam)
- Skincare routines for their soothing, hydrating feel
- Capsules or moss powder as a daily supplement
Many fans use sea moss to support:
- A healthy immune system
- Clearer skin and reduced inflammation
- Energy levels and metabolism
- Regular digestion, thanks to its prebiotic fiber
Its benefits can vary based on how it’s made and how often you use it. That’s why the prep method matters, and why some people are careful about boiling vs. soaking.
Next, we’ll look at the most common ways to prepare sea moss and how each one affects the texture and nutrient value of the final gel.
Preparation Methods for Sea Moss
The method you choose can affect the texture, taste, and even how many nutrients make it into your final product.
Two of the most common approaches are boiling and blending; each has its pros and trade-offs.
A. Boiling Methods
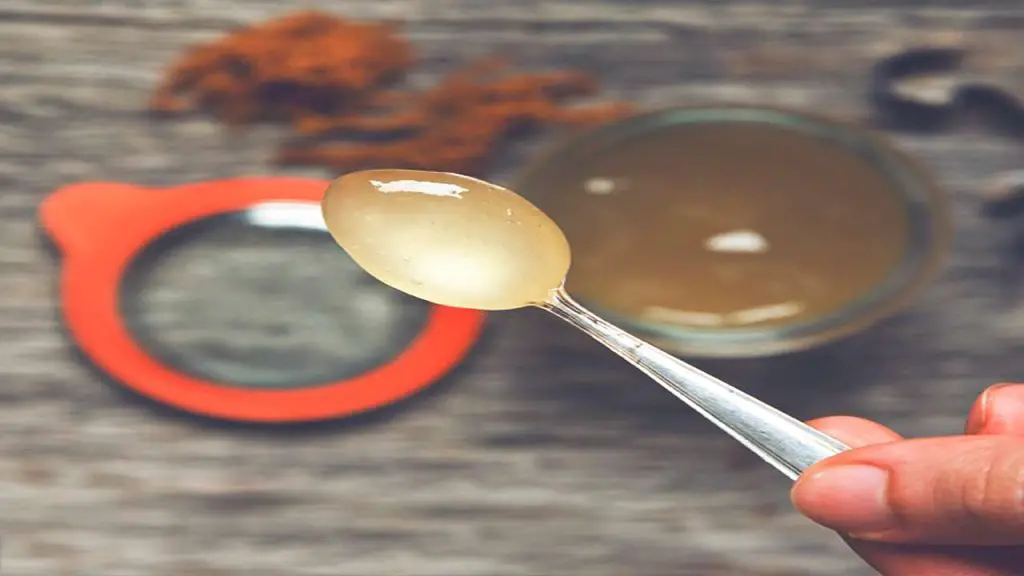
The boiling method is often chosen for speed and consistency. It softens the moss quickly and gives the gel a smooth, pourable texture.
Basic steps:
- Rinse thoroughly with cold water to remove sand and debris
- Soak in fresh water for 10–15 minutes (optional but recommended)
- Add to a medium-sized saucepan with about a cup of water
- Boil gently for 10–15 minutes, stirring occasionally
- Let cool, then blend into gel or store as-is
Things to note:
- This method tends to reduce any fishy smell
- It’s convenient for batch prep and storing gel in airtight containers
- Some heat-sensitive nutrients may be reduced slightly with prolonged boiling
- Ideal for people who prioritize texture and convenience over raw nutrient preservation
B. Blending Techniques
The blending method skips the heat and relies on soaking instead. It’s a favorite for those who want to preserve as many essential nutrients as possible.
Steps:
- Rinse thoroughly
- Soak in alkaline water or cold tap water for 12–24 hours
- Drain and blend the soaked moss with fresh water until smooth
- Store in the fridge using an airtight container or in an ice-cube tray for portioned use
Benefits:
- Retains more of the natural mineral content
- Maintains the original sea moss taste and texture
- Requires more time and planning
- The final gel may be thicker or have more texture
Both methods work, but the best one for you depends on how much time you have and what you’re hoping to get from your sea moss gel.
Next, we’ll look at what boiling does to the nutrient content and how it compares to other prep styles when it comes to vitamin and mineral retention.
Effects of Boiling on Nutrient Retention
Boiling sea moss helps break it down quickly, but it also raises a fair concern: What happens to the nutrients when heat is involved?
The answer depends on the temperature, the length of boiling, and which nutrients you’re talking about.
A. Impact of Heat on Vitamins and Minerals
Not all nutrients respond to heat in the same way.
- Heat-sensitive vitamins like Vitamin C and some B vitamins can break down during boiling. That means if you’re boiling sea moss for 20 minutes or more, some of those nutrients may be reduced.
- Essential minerals like iodine, calcium, magnesium, and potassium are more stable. These tend to stay intact even when sea moss is boiled for short periods.
So while you may lose a bit of the vitamin content, most of what sea moss is known for, its mineral content, will still be present in the gel.
Tip: To retain more of the good stuff, keep the boil time under 15 minutes and avoid high heat.
B. Comparison with Other Cooking Methods
Different preparation methods affect nutrients in different ways. Here’s a quick comparison:
| Method | Nutrient Retention | Texture | Time Needed |
| Boiling | Most minerals remain, some vitamins lost | Smooth, pourable | 10–15 minutes |
| Cold soak + blend | Higher retention overall | Thicker, more natural | 12–24 hours soak |
| Raw consumption | Highest, if properly cleaned | Chewy, less convenient | Minimal prep |
Cold methods take longer, but they tend to preserve more nutrients. Boiling is faster and great for daily use, especially if you’re planning to add the gel to hot foods or drinks where some heat loss is expected anyway.
Next, we’ll weigh the pros and cons of the boiling method and how it compares when you’re balancing convenience with nutritional goals.
Benefits and Drawbacks of Boiling Sea Moss

Boiling sea moss is one of the most common ways people prepare it, especially if they’re looking for a smoother gel or need it ready fast.
A. Achieving Desired Texture
One of the main reasons people boil sea moss is for texture.
- The heat softens the moss quickly, making it easier to blend
- The final moss gel tends to be smooth, creamy, and pourable
- This consistency works well in teas, soups, or when storing in ice-cube trays for later use
Boiling also helps reduce the fishy smell some people notice in raw sea moss, making it more appealing to mix into smoothies or cook with.
If your goal is convenience and versatility in the kitchen, the boiling method delivers.
B. Balancing Nutrient Preservation and Practicality
Boiling sea moss is fast, but it can slightly reduce the levels of heat-sensitive vitamins. For most people, this isn’t a dealbreaker, especially since the main benefits of sea moss come from its mineral content, which mostly stays intact.
So, it comes down to what matters most to you:
- Want the maximum nutrients? Cold soak and blend.
- Need something quick, with better texture and shelf life? Boiling might be the better option.
- Using sea moss as a daily supplement? The difference in vitamin content won’t outweigh the convenience for many users.
If you’re eating 1–2 tablespoons a day as part of a routine, both methods can work; it’s just about what fits your lifestyle.
Next, we’ll explore alternative preparation options like cold soaking and raw use, and when it might make sense to skip the heat altogether.
Alternative Preparation Methods
Not everyone wants to boil their sea moss. If your goal is to preserve the maximum amount of nutrients, especially vitamins, there are gentler ways to prepare it.
Two common options are cold soaking and raw consumption, both of which skip the heat entirely.
A. Cold Soaking
The cold soak method is popular with people who want to keep as much of the original nutrition as possible.
Here’s how it works:
- Rinse the moss well with cold water to remove sand and salt
- Soak it in fresh or alkaline water for 12 to 24 hours
- After soaking, blend it with clean water until smooth
- Store in an airtight container in the fridge or freeze in an ice-cube tray for easy portions
Benefits of this method:
- Preserves more heat-sensitive nutrients like B vitamins
- Keeps the mineral content intact
- Produces a thicker gel with a more natural moss taste
- No need for boiling or cooking tools
This method takes more time but works well if you’re using sea moss in cold drinks or smoothies and want the closest thing to raw nutrition.
B. Raw Consumption Considerations
Some people choose to eat raw sea moss after a basic rinse and soak, especially when using Dried Raw Irish Sea Moss or Eucheuma Cottonii.
While this might preserve every nutrient, it’s not always practical or safe.
Here are a few things to keep in mind:
- Raw sea moss can carry bacteria or sand if not cleaned properly
- The taste and texture can be tough to get used to, chewy, salty, and ocean-like
- You’ll still want to soak it for at least a few hours in clean water to rehydrate and soften it
For most people, blending after soaking is a more comfortable way to use sea moss raw, without eating it straight off the dry plate.
Up next, we’ll cover how to store your moss gel properly, so you get the longest shelf life without losing quality or nutrients.
Proper Storage of Sea Moss Gel
Sea moss is perishable, and if it’s not stored right, it can go bad quickly, especially in warmer climates or room-temperature areas.
A. Optimal Storage Conditions
For best results, always store your sea moss gel in an airtight container and keep it refrigerated.
Here’s where and how to store it:
- Refrigerator: Keeps gel fresh for up to 3–4 weeks
- Freezer (in ice-cube trays): Can last 3–6 months, depending on how often it’s opened
- Pantry storage: Not recommended, mold can develop quickly unless the gel is fully dehydrated or powdered
Pro tip: When freezing, portion your gel into an ice-cube tray for easy daily use in smoothies or teas.
B. Duration and Preservation Tips
Sea moss doesn’t always give clear signs it’s gone bad, but there are a few things to watch for.
Signs your gel may be spoiled:
- A strong sour or spoiled sea moss smell
- Visible molding, even small specks
- Separation of gel with cloudy or slimy liquid on top
- Unusual color changes or dark spots
To extend freshness:
- Use clean utensils when scooping out gel
- Don’t double-dip or leave the lid off for long
- Avoid storing near raw food or anything with strong odors
If you ever notice your gel smells off or looks questionable, it’s best to toss it and make a fresh batch.
In the final section, we’ll look at creative ways to use sea moss daily and how to make sure you’re still getting the most nutrition out of each serving.
Incorporating Sea Moss into the Diet

Sea moss is flexible. Once it’s in gel form, you can add it to all kinds of meals and drinks without much effort.
A. Creative Recipe Ideas
You don’t have to eat sea moss by the spoonful. The mild flavor and thick texture make it perfect for blending into things you already enjoy.
Here are a few easy recipes to add 1–2 tablespoons of moss gel to your day:
- Smoothies – Blend into fruit-based drinks for a nutrient boost
- Soups and stews – Add during cooking to thicken without changing taste
- Oatmeal or chia pudding – Stir in while warm for extra minerals
- Sea moss jam – Try it in a recipe like Blueberry Chia Sea Moss Jam
- Homemade sauces – Use to create a natural gel base for dressings
- Tea or warm water – Dissolve in hot liquids (just don’t boil it again)
Some also mix it into baked goods, but keep in mind that heating the gel again may reduce more of the heat-sensitive nutrients.
B. Ensuring Nutritional Value Retention
To get the most from your seaweed gel, a few small habits can help:
- Don’t reboil the gel after it’s made, stir into warm, not boiling, dishes
- Store in a clean airtight container in the fridge or freezer
- Stick to cold blender methods or short boiling times when preparing
- Use filtered or alkaline water during soaking and blending for cleaner results
- Measure out portions using ice-cube trays for better shelf life and portion control
Used the right way, sea moss can be a simple but powerful part of your health routine.
Conclusion
Boiling sea moss doesn’t destroy all its nutrients, but it can lower some of the more delicate ones, like vitamin C and certain B vitamins. That said, the key minerals sea moss is known for, like iodine, magnesium, and potassium, mostly stay intact.
So if you’re boiling it for smoother texture or convenience, you’re still getting plenty of the health benefits sea moss has to offer. Just avoid overcooking it, and store your gel properly to keep it fresh.
Whether you soak, blend, or boil, what matters most is using sea moss in a way that fits your lifestyle and doing it consistently. One or two tablespoons a day can go a long way.
FAQ’s:
No, not all. Boiling may reduce some heat-sensitive vitamins, like vitamin C, but most of the essential minerals, like iodine, magnesium, and potassium, remain stable during the process.
Keep it to 10–15 minutes on low to medium heat. This is usually enough to soften the moss for blending without breaking down too many of the beneficial nutrients.
Cold soaking and blending tend to preserve the most nutrients, especially if you’re looking to keep vitamins intact. But if you prefer smoother moss gel or quicker prep, boiling works just fine for everyday use.
Yes, you can — though it’s not common. If you’re experimenting with texture or flavor, blending both types is fine. Just make sure everything is properly cleaned and soaked beforehand.
5. How can I tell if my moss gel has gone bad?
Watch for:
- A spoiled or sour smell
- Molding around the edges or on top
- Slimy separation or unexpected texture changes
If you see any of these signs, it’s best to toss it and make a fresh batch.
Amazon and the Amazon logo are trademarks of Amazon.com, Inc, or its affiliates